
How to Fix Pixelated Photos (What Actually Works in 2026)
Pixelation isn’t blur, and the difference matters — reach for a sharpen slider on a pixelated image and you’ll make it worse. This guide shows you how to tell which problem you actually have, the free tools that genuinely repair it, and the honest limits of what any software can recover.
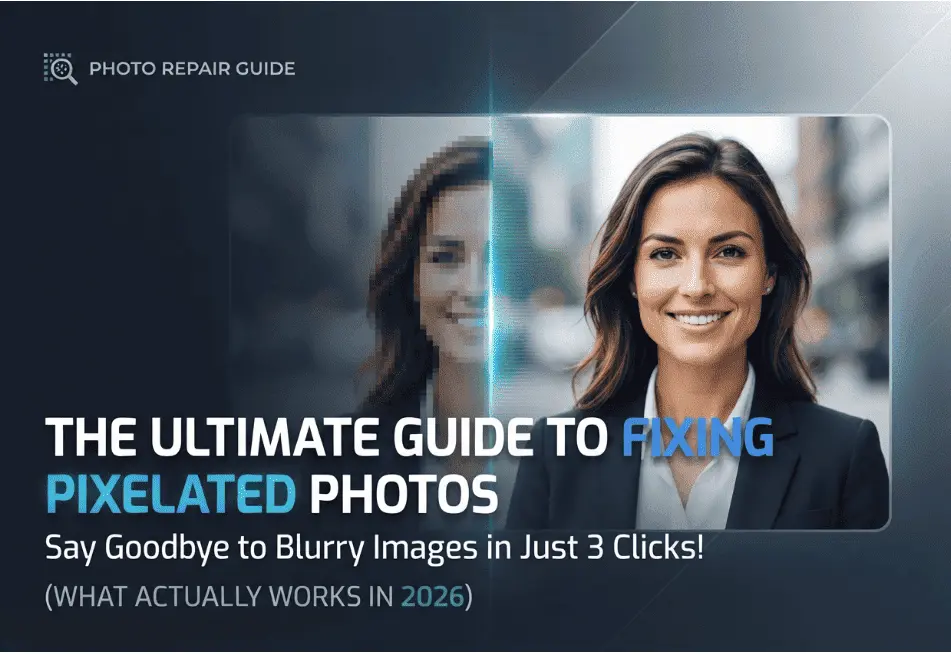
Use an AI upscaler, not a sharpen tool. The free option that consistently beats paid competitors is Upscayl — open source, runs entirely on your own computer, no uploads and no watermarks. On a phone, Google Photos has a built-in Unblur tool. In Photoshop, use Generative Upscale or Camera Raw’s Super Resolution rather than plain Image Size. One honest caveat before you start: no tool recovers detail the camera never captured. Modern AI generates plausible detail, which looks convincing and is often exactly what you need — but it’s reconstruction, not recovery, and that distinction matters if the image is evidence, a legal document, or anything where accuracy is the point.
Here’s the thing almost every guide on this gets wrong. They treat “pixelated,” “blurry,” “grainy” and “low quality” as the same complaint, then hand you a sharpening slider. But sharpening a pixelated image doesn’t soften those blocky squares — it makes their edges crisper and more obvious. You end up with a picture that looks worse than when you started, and no idea why.
So we’ll start by working out what’s actually wrong with your photo. It takes about thirty seconds, and it decides everything that follows.
First, Work Out What’s Actually Wrong
Open your image and zoom to 200%. What you see there tells you which of four completely different problems you have — and each one has a different fix.
| What you see at 200% | The problem | What fixes it |
|---|---|---|
| Visible square blocks with hard edges, like large Lego bricks | Pixelation — not enough resolution for the size | AI upscaling. Never sharpening. |
| Soft, smeared edges — no squares, everything just fuzzy | Blur — camera shake or missed focus | Deblur tools such as Google Photos Unblur |
| Blotchy halos around edges, mushy patches in flat areas like sky | JPEG compression artifacts | Find the original file. Failing that, a JPEG artifact remover. |
| Coloured speckles, worst in shadows and dark areas | Noise — high ISO or low light | A denoiser, applied before any upscaling |
Plenty of photos have two or three of these at once — a phone snap taken in a dim restaurant, cropped hard, then sent through WhatsApp will have all four. When that happens, order matters: denoise first, then upscale. Upscaling noisy pixels just gives you bigger, more confident noise.
The Honest Truth About “Unpixelating” an Image
Every crime drama has the scene where someone says “enhance” and a blurry number plate resolves into perfect text. That isn’t how any of this works, and being clear about it will save you a lot of frustration.
When a photo is captured at low resolution, the detail was never recorded. It isn’t hiding in the file waiting to be extracted — it doesn’t exist. What modern AI upscalers do is different and, honestly, quite remarkable: having been trained on millions of images, they generate detail that is statistically plausible for what they’re looking at. Shown a blocky patch that resembles hair, the model produces convincing hair texture. Not the hair that was actually there. Hair that could have been.
For most purposes this is completely fine, and the results look genuinely good. But it splits the field in two, and knowing which side you’re on tells you which tool to pick:
- Stays close to the original, adds detail conservatively.
- Right for real photographs — people, products, documents.
- Faces stay recognisably the same person.
- Tools: Upscayl, Topaz Gigapixel, Let’s Enhance, Lightroom Super Resolution.
- Invents substantial new detail and texture.
- Right for AI art and illustration, where invention is welcome.
- Can visibly change a face — avoid for photos of real people.
- Tools: Magnific and similar generative upscalers.
How to Fix a Pixelated Photo for Free
The best free option isn’t a website — it’s a desktop app called Upscayl. It’s open source, runs on Windows, macOS and Linux, and does all its work on your own machine using the same underlying models that several paid services are built on. Nothing is uploaded anywhere, there’s no account, no file-size cap beyond your own hardware, and no watermark stamped across your image.
- Download and install it, then drag your image in.
- Pick a model — start with the general photo one.
- Choose your scale factor: 2× or 4× to begin with.
- Set an output folder and click Upscayl.
- Compare against the original before you commit to it.
- Always start from the highest-quality original you have.
- Go to your final size in one pass, not several.
- Never chain two different upscalers together.
- Try the digital-art model for logos and flat graphics.
- Batch mode handles a whole folder at once.
That “one pass” advice is worth taking seriously. Running an image through 2× twice does not equal 4× — each pass treats the previous pass’s invented detail as real and builds on top of it. Errors compound, and you get that slightly plastic, over-processed look. Pick your target size and get there in a single step.
Fixing Pixelated Photos on Your Phone
You don’t need a computer for most everyday cases. Google Photos has the tool worth knowing about, and it’s free on both Android and iPhone — it started as a Pixel exclusive but has since opened up to all Google Photos users without a subscription.
- Open the photo in Google Photos.
- Tap Edit, then Tools.
- Tap Unblur and let it process.
- Drag the slider to dial the strength up or down.
- Tap Save copy — it keeps your original.
- It works on photos from any phone, not just Pixels.
- Needs Android 8+ or iOS 15+ and a few GB of free storage.
- It targets blur and noise more than pixelation.
- Pull the slider back — the default often overshoots.
- For true pixelation, a desktop upscaler still wins.
That last point is the honest one. Unblur is excellent at what it’s designed for — a shot ruined by a shaky hand or a slow shutter. It’s much less impressive on a genuinely low-resolution image, because that’s a different problem. If your diagnosis in the first section said “square blocks,” a proper upscaler on a computer will do noticeably better.
The App Store and Play Store are full of AI enhancer apps too. Some are decent. Be aware that many upload your photos to a server to process them, and that the free tier usually caps resolution or adds a watermark. Read what you’re agreeing to before feeding it family photos.
Fixing Pixelated Images in Photoshop and Lightroom
If you already pay for Creative Cloud, you have capable tools — but only if you avoid the obvious one. Plain Image Size with bicubic resampling just interpolates: it averages neighbouring pixels and produces something smooth and soft rather than detailed. It isn’t AI, and it never was.
- Use Generative Upscale, Photoshop’s AI upscaling, for up to 4×.
- Or Image → Image Size with Preserve Details 2.0.
- Add a little Reduce Noise afterwards if it looks crunchy.
- Work on a duplicate layer so you can compare.
- Right-click the photo → Enhance.
- Tick Super Resolution for a clean 2×.
- It’s deliberately conservative — safe, rarely dramatic.
- Best on RAW files, where there’s more to work with.
Both Adobe options are on the cautious side. That’s a feature rather than a flaw for real photography, where you want the person to still look like themselves. But if you need a big enlargement — going to print, say — a dedicated upscaler will generally get you further. Subscribing to Creative Cloud purely for upscaling makes little sense when Upscayl is free and, in most side-by-side tests, at least as good.
Which Tool for Which Job
| Your situation | Use this | Why |
|---|---|---|
| Any low-res photo, no budget | Upscayl | Free, offline, no watermark, genuinely competitive with paid tools |
| Professional photography, RAW files | Topaz Gigapixel or Photo AI | Strong face recovery, batch processing, Lightroom integration |
| Quick fix on your phone | Google Photos Unblur | Free, built in, no upload, keeps the original |
| Already inside Photoshop | Generative Upscale | No new software, non-destructive, up to 4× |
| AI art or illustration | Magnific or similar | Invents detail generously, which suits art and ruins portraits |
| Anime or line art | waifu2x, or an art model | Trained on flat colour and clean linework |
| Deliberate pixel art | Nearest-neighbour at 2× or 4× | Keeps the hard pixel edges instead of smoothing away the whole point |
| A logo or icon | Ask for the vector file | An SVG, AI or EPS scales infinitely and beats any upscale |
Tool pricing and free tiers in this category change constantly, so check the current terms on the vendor’s own page before committing to anything paid. The free options above are stable, and for a one-off job they’re usually all you need.
Why Your Logo Looks Pixelated in Email Signatures
This one deserves its own section, because it’s the most common pixelation problem in business — and no upscaler will fix it, because the image is usually fine. The display is the problem.
Phones and modern laptops have high-density screens that pack two or three physical pixels into the space of one CSS pixel. If you export a logo at exactly the size it will display — 150 pixels wide for a 150-pixel slot — that screen has to invent the extra pixels itself. Result: a logo that looks crisp on an old monitor and noticeably soft or blocky on every phone.
width="150" height="50". The file contains enough detail for a high-density screen, while the email lays it out at the intended size. This single change fixes the majority of blurry signature logos.width="200" stretches it with no extra detail — that’s pixelation you created yourself. Always resize the actual file.If you’d rather sidestep image problems altogether, it’s worth knowing that a signature doesn’t need images to look professional. Our free email signature templates are built entirely without them, partly for this reason and partly because a large share of recipients block images by default. For teams, our guide to Office 365 email signature management covers deploying one correctly-sized logo across everyone at once, rather than fifty people each resizing their own.
How to Stop Photos Pixelating in the First Place
Every fix above is damage control. These habits mean you need them far less often.
Frequently Asked Questions
Use an AI upscaler rather than a sharpening tool — sharpening makes pixelation more obvious, not less. The best free option is Upscayl, an open-source desktop app for Windows, macOS and Linux that runs entirely on your own computer with no uploads or watermarks. Drag the image in, choose 2× or 4×, and export. On a phone, Google Photos has an Unblur tool under Edit → Tools. In Photoshop, use Generative Upscale or Camera Raw’s Super Resolution rather than plain Image Size. Before any of that, spend two minutes looking for a higher-quality original — it beats any amount of processing.
Not in the sense of recovering the original detail, because that detail was never recorded — it isn’t hidden in the file. What AI upscalers do is generate detail that’s plausible for what they’re looking at, based on training across millions of images. The results genuinely look good and for most purposes that’s exactly what you want. But it’s reconstruction rather than recovery, and the invented detail can be wrong. Don’t rely on it for anything where accuracy matters more than appearance: evidence, insurance photos, medical images, or reading a serial number or licence plate.
Almost always because the image is being displayed larger than its actual pixel dimensions allow. Common causes: the photo was cropped heavily, digital zoom was used when it was taken, it was saved at a small size, it came through a chat app that compressed it, or it’s being stretched to fill a space bigger than the file. Check the real dimensions by right-clicking and choosing Properties or Get Info — if a 400-pixel-wide photo is filling a 1200-pixel space, that’s your answer. Repeated saving as JPEG also degrades an image over time even at the same size.
They look similar at a glance but have opposite causes and opposite fixes. Pixelated means not enough resolution — zoom in and you’ll see distinct square blocks with hard edges, caused by stretching a small image. Blurry means the detail was captured softly, from camera shake or missed focus — zoom in and everything is smeared, with no squares anywhere. Pixelation needs AI upscaling. Blur needs a deblur tool such as Google Photos Unblur. Using the wrong one wastes your time, and sharpening a pixelated image actively makes it look worse.
Upscayl is the strongest free option and holds its own against paid tools in most comparisons. It’s open source, runs offline on your own machine, has no file limits beyond your hardware, and doesn’t watermark your output. Because it processes locally, your photos never leave your computer — which matters for family pictures or anything work-related. Free web-based upscalers exist too, but they typically cap output resolution, require an account, or watermark results on the free tier, and they involve uploading your image to someone else’s server.
Open it in Google Photos, tap Edit, then Tools, then Unblur, and adjust the slider before saving a copy. It’s free on both platforms, no subscription needed, and works on photos taken with any phone — you’ll need Android 8 or later, or iOS 15 or later, plus a few gigabytes of free storage. Be aware it’s tuned for blur and noise rather than true pixelation, so a genuinely low-resolution image will improve more on a desktop upscaler. Third-party enhancer apps can help, but many upload your photos to a server and limit resolution on the free tier.
Enlarging always involves some compromise — the question is how well it’s disguised. Old-style resampling averages neighbouring pixels and gives you a soft, mushy result. AI upscaling generates new detail and looks dramatically better. For the cleanest outcome: start from the highest-quality original you have, remove noise before enlarging rather than after, go to your final size in a single pass instead of several, and don’t run the image through two different upscalers. Each pass treats the previous one’s invented detail as real, so errors compound into a plastic-looking image.
Because the file was exported at exactly its display size, and phone screens pack two or three physical pixels into each one. Export the logo at double the intended display width, then set the HTML width and height attributes to the display size — a 300-pixel-wide file shown at width="150". That gives high-density screens enough detail while keeping the layout correct. Also use PNG rather than JPEG for logos: JPEG is built for photographs and smears the hard edges and flat colour a logo is made of, which produces visible halos around text.
The Bottom Line
Diagnose before you fix. Zoom to 200% — hard-edged squares mean pixelation and need AI upscaling; soft smearing means blur and needs a deblur tool. Reaching for the sharpen slider on a pixelated image is the single most common mistake, and it always makes things worse.
For most people the whole answer is: hunt for a better original first, then run it through Upscayl once, at the size you actually need. It’s free, it stays on your computer, and it beats a lot of paid software. Just keep in mind you’re getting plausible detail rather than real detail — which is fine for a family photo or a website banner, and not fine for anything that has to be accurate.