Every single email you send is a tiny billboard for you and your company. Yet most people slap together a boring name + phone number + a broken LinkedIn icon and call it a day. The result? You look exactly like everyone else in the inbox.
A sharp, well-designed Office 365 email signature fixes that instantly. It turns every message into a polished digital business card, builds trust, reinforces your brand, and (when done right) even drives clicks to your website or booking calendar.

I’ve set up thousands of these over the years for freelancers, startups, and Fortune-500 teams, so here’s the exact process I still use in 2025 — updated for the current Microsoft 365 interface, dark mode, mobile rendering, and all the little quirks that still trip people up.
What a Great Office 365 Signature Should (and Shouldn’t) Do
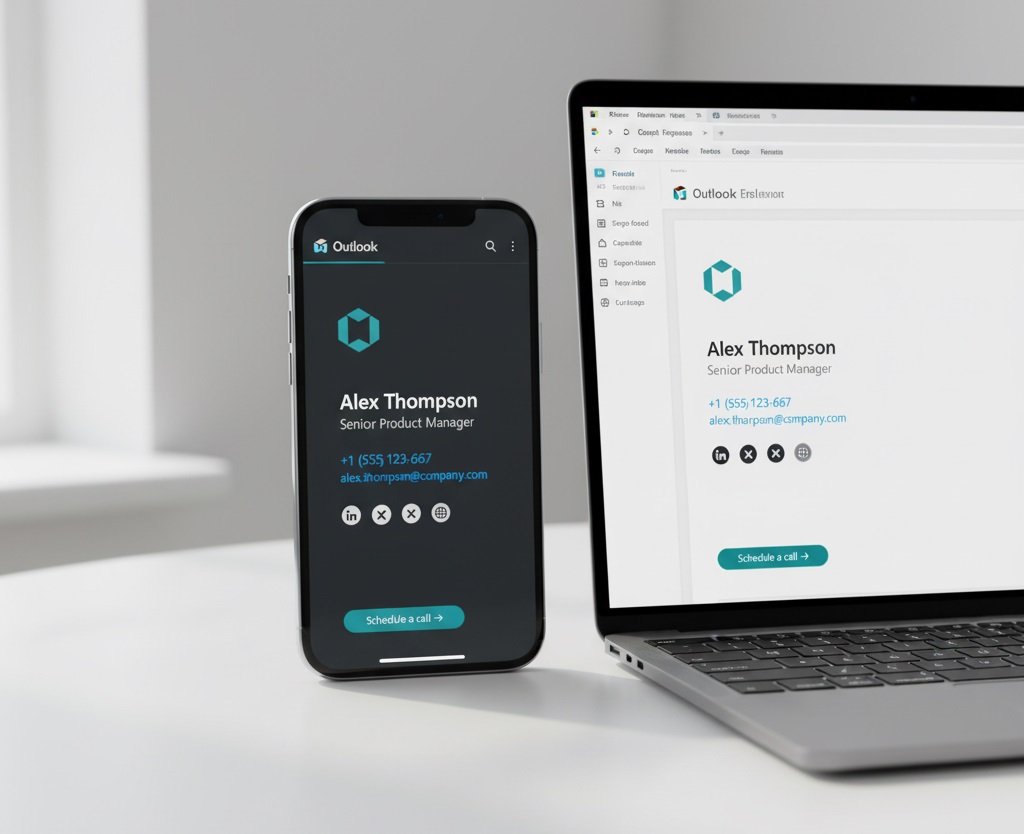
Before we touch Outlook, decide what belongs in there. The best signatures I’ve seen are simple, scannable, and useful.
Keep:
- Your full name and pronunciation if it’s unusual (e.g. “Tomasz (Tom) Kowalski”)
- Current job title
- Company name + link to homepage
- One phone number (mobile is usually better than switchboard)
- Company logo (small and crisp)
- Relevant social icons (LinkedIn + maybe one more — no one needs your TikTok in a work email)
- A single call-to-action if you’re running a campaign (“Grab your seat for our Dec 10 webinar →”)
Skip:
- Ten different colors and fonts
- Animated GIFs (Outlook still murders them)
- Personal inspirational quotes
- Your home address unless you actually want parcels sent there
- Huge hero banners that make the email 3 MB
Less is almost always more.
Method 1: Quick & Clean – Do It Yourself in Outlook Web (Works Everywhere)
This is still the fastest way for individuals and tiny teams.
- Go to outlook.office.com and sign in.
- Click the gear icon → View all Outlook settings → Mail → Compose and reply.
- Scroll to “Email signature”.
- Build your signature right inside the editor (or paste clean HTML — more on that in a minute).
- Tick the boxes so it appears on new messages and/or replies.
- Hit Save.
Pro move: Instead of copy-pasting from Word (which adds invisible junk code), type directly or paste as plain text first, then re-add formatting.
Adding a Logo or Social Icons Without Breaking Everything
Outlook loves to turn your beautiful logo into a 3 MB attachment. Avoid the pain:
- Resize your logo to about 200 × 80 px and export as PNG with transparent background.
- Keep file size under 80 KB.
- Click the little image icon in the signature editor and upload – do NOT copy-paste from another email.
- For social icons, use a free set from Icons8 or Flaticon, make them 28 – 32 px, and hyperlink each one individually.
If you want the signature to look perfect on phones and in dark mode, host the images online (Microsoft 365 OneDrive or ImgBB work fine) and use direct links instead of uploading. Yes, it’s one extra step, but it stops the dreaded “broken image” box.
Method 2: Outlook Desktop App (Still Needed for Some People)
The desktop version doesn’t sync with the web, so you’ll have to recreate it, but it gives slightly better formatting control.
File → Options → Mail → Signatures → New → build → assign to accounts → OK.
Just remember: whatever you create here stays on that computer only.
Method 3: Company-Wide Signatures the Native Way (Transport Rules)
If you’re an admin and want every employee to have the exact same branding and disclaimer, you can do it for free inside Microsoft 365 — it’s just a bit clunky.
- Go to admin.microsoft.com → Exchange admin center → Mail flow → Rules.
- Create a new rule → name it “Company Signature”.
- Condition: Apply to all messages.
- Action: Append the disclaimer (this is where you paste your full HTML signature).
- Use the built-in variables like %%DisplayName%%, %%Title%%, %%MobilePhone%% so everyone gets their own details automatically.
Downsides: the signature always appears below the reply (not where the user placed their cursor), you can’t easily add banners or track clicks, and updating it later means editing the rule again. Works fine for basic legal disclaimers, but most growing companies outgrow this fast.
The 2025 Shortcut Most Companies Actually Use: A Proper Email Signature Manager
Once you go past 15–20 people, doing this manually is madness. Tools like Exclaimer, CodeTwo, Opensense, or Sigsync (there are dozens now) let you:
- Design once in a drag-and-drop editor that actually looks good on every device
- Pull photos, titles, and phone numbers automatically from Azure AD
- Roll out different templates per department or office
- Add time-bound campaign banners that disappear automatically
- See analytics on how many people clicked your “Book a demo” button
Yes, they cost money, but the time is money, and these platforms save hours every month while making you look significantly more professional.
Final Checklist Before You Hit Send to a Client
- Send a test to your personal Gmail and iPhone
- Check it in dark mode
- Click every link
- Confirm images aren’t showing as attachments
- Ask a colleague “does this look professional?” (you’d be amazed what you miss)
Do this once, and every single email you send for the next year will quietly make you look sharper than 95 % of the inbox.
Your email signature isn’t just a footer — it’s free real estate. Use it wisely, keep it updated, and watch how something this small makes a surprisingly big difference.